
How to Receive and Accept an ACH/EFT Payment
Welcome to our ACH/EFT ePayments system for qualified vendors and medical service providers! This guide will walk you through the process of receiving and accepting your workers' compensation vendor invoice payments. Please follow the steps below to ensure a smooth and timely transfer of funds to your bank account.
1. Enroll in ePayments
Before receiving ePayments, you must enroll in our system. Review this article's steps to complete your enrollment:
2. Receiving Payment Notifications
After enrolling in ePayments, you will receive email notifications from Carepay for individual invoice payments. Here’s what to expect:
Payment Notification Emails:
Payment notifications are sent from notifications@carepay.prod.verituityplatform.com. If this is your first time receiving them, please check your spam or junk folder and mark them as “Not Spam” to ensure future delivery. If you don’t see any emails, please click HERE for additional troubleshooting steps.
-
You will receive an email at the address you used during enrollment each time a payment is made.
-
The email will contain details about the payment, including the invoice number, amount, and claim number like this:
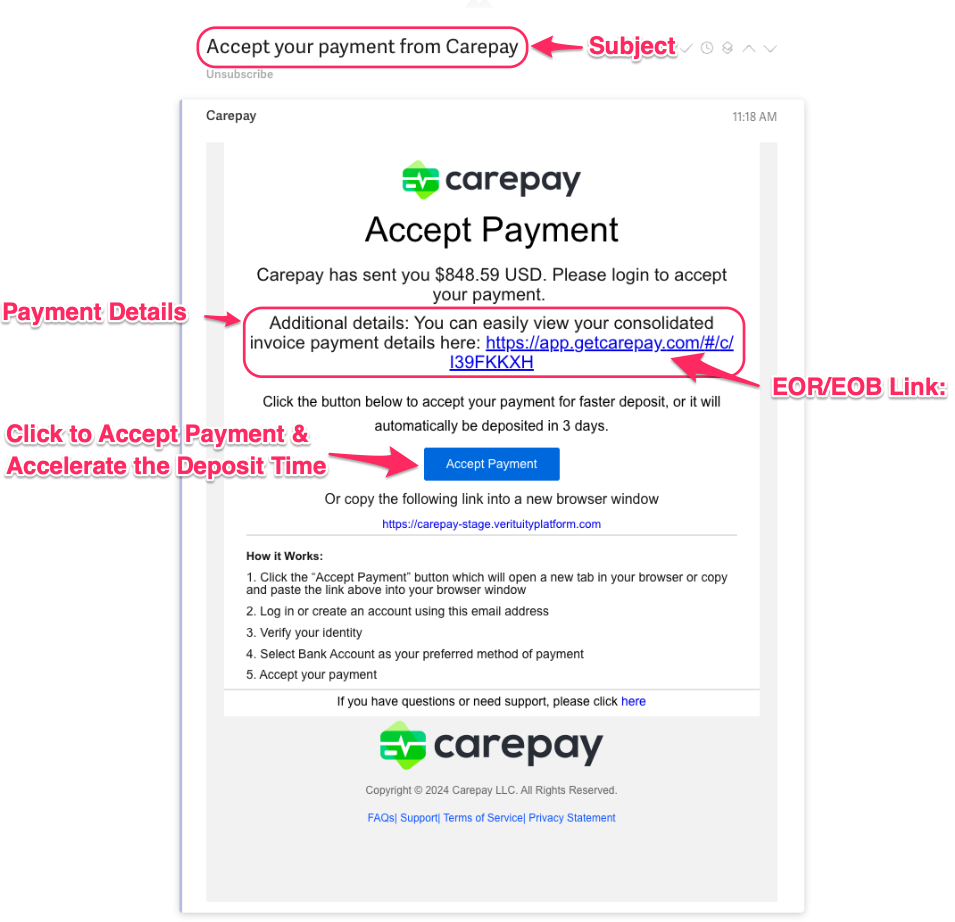
Secure Link to EOB/EOR for Medical Providers:
-
The email will also include a secure link for medical service providers to view the Explanation of Benefits (EOB) or Explanation of Review (EOR) corresponding to the payment.
-
View this article for more information on accessing EOB/EORs.
3. Logging Into Your Account
To login to your account and accept your payment, follow these steps:
-
Click on the Email's blue "Accept Payment" Button:

2. Doing so will bring you to our Payee Select secure login to access your account.
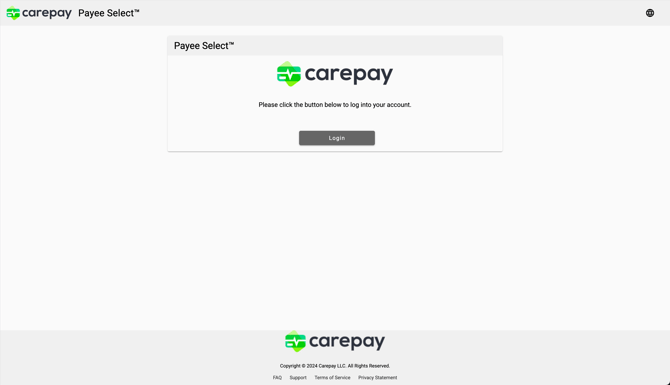
Click the gray "Login" button, which brings you to this screen:
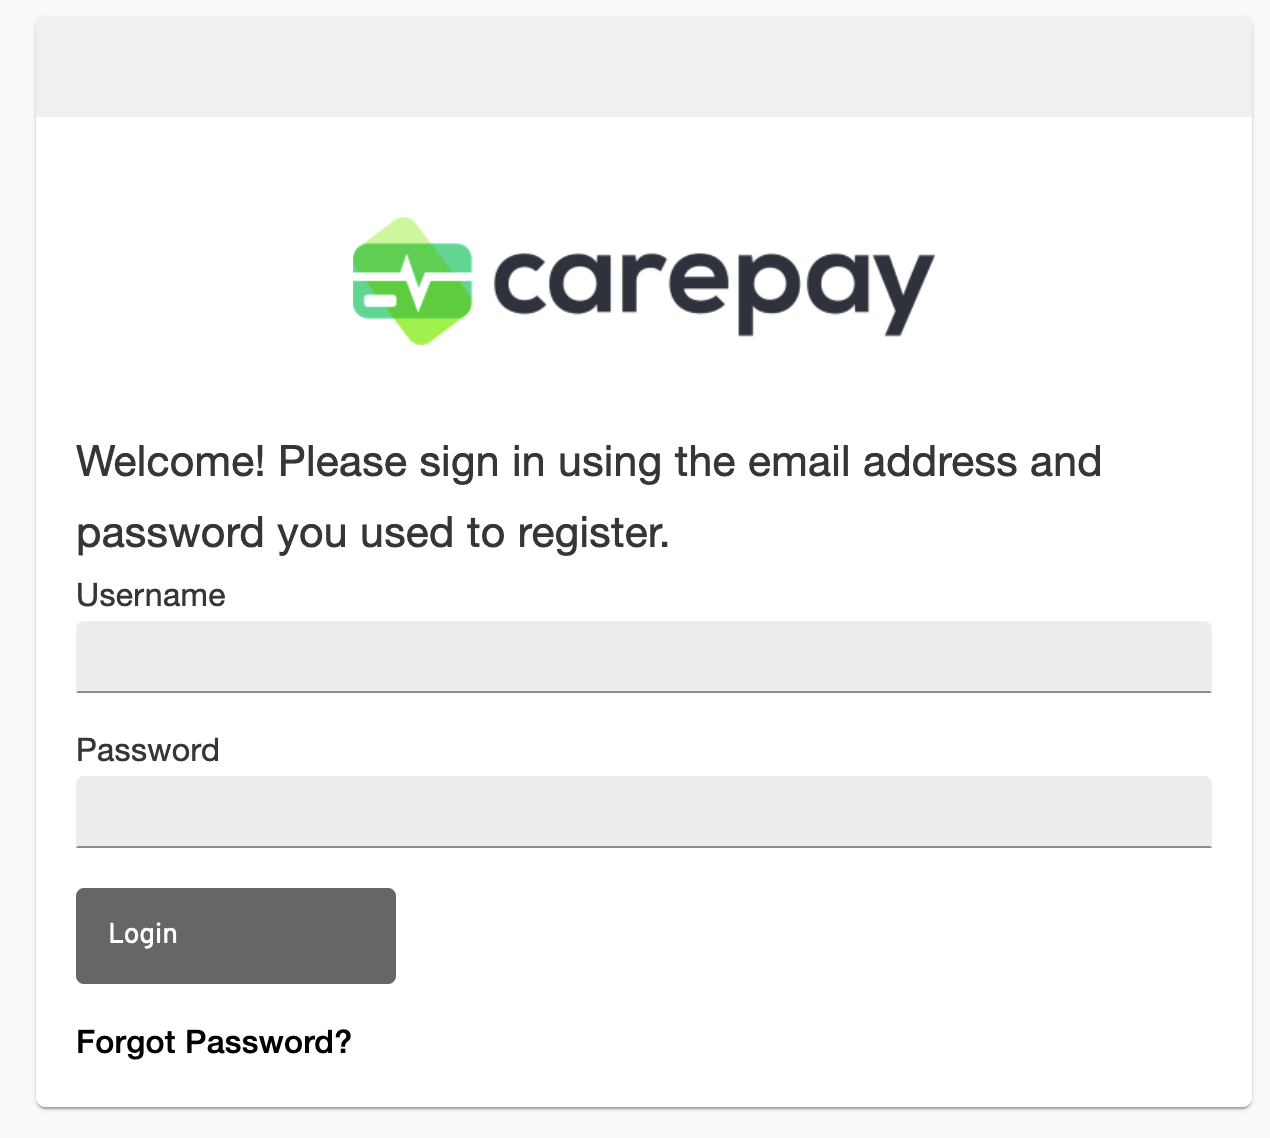
3. Enter your account credentials and click the grey "Login" button.
4. Accessing Your Dashboard and Accepting Your Payment
Once logged into your account, follow these steps to accept your payment:
-
Accessing Your Dashboard:
-
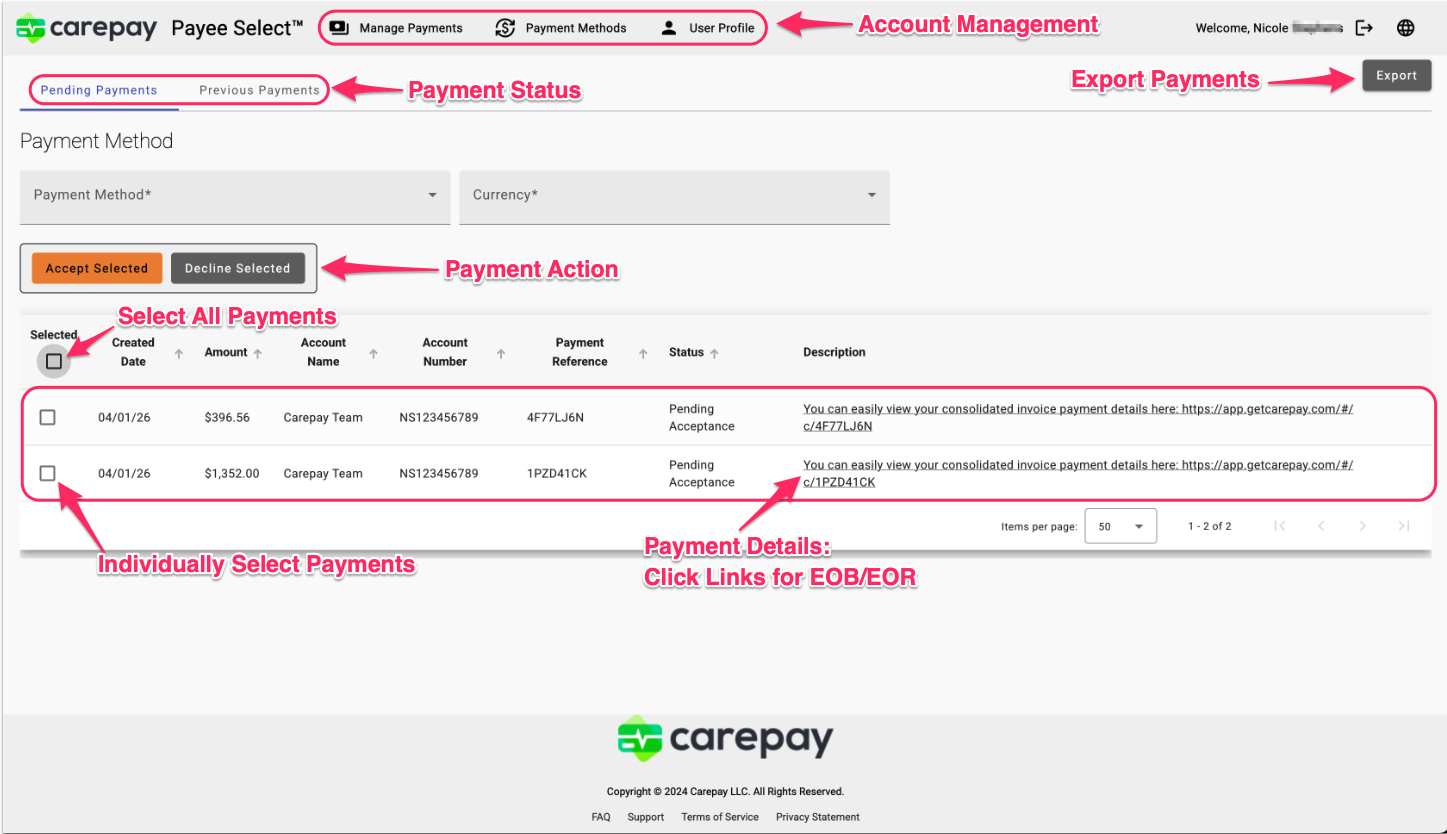
Your Payee dashboard lets you accept payments, manage your account, and review your payment history
-
5. View and Accept Payment:
-
Each payment row in your dashboard requires you to accept the payment to accelerate the deposit time. You can either select all Pending Acceptance payments or select them individually.
If you do not accept the payment within 3 business days, the payment will automatically be deposited into your "Preferred Payment Method."
Confirm your acceptance by clicking the orange "Accept Selected" button.
6. Finalizing Your Payment Acceptance:
-
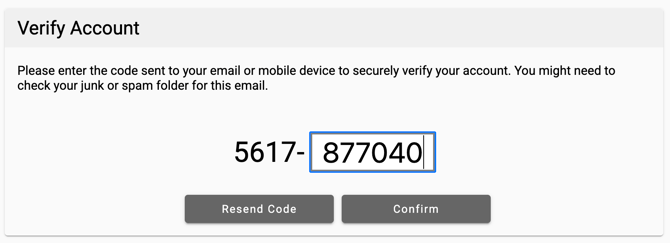
After clicking the orange "Accept Payment" button, for added security, we require a one-time passcode to finalize the payment. You will be redirected to a screen that look like this:

We will send the code to the account's email address, which looks like this:
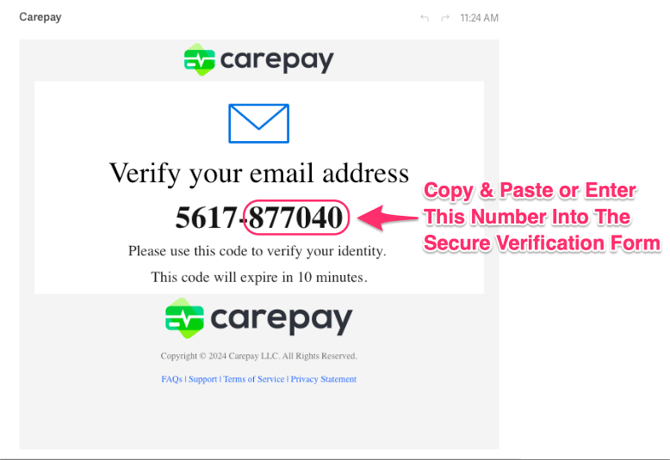
Copy and paste, or enter the number from your email into the prompt so it appears like the screenshot below and click the "Confirm" button.
7. Reviewing Your Approved Payments:
-
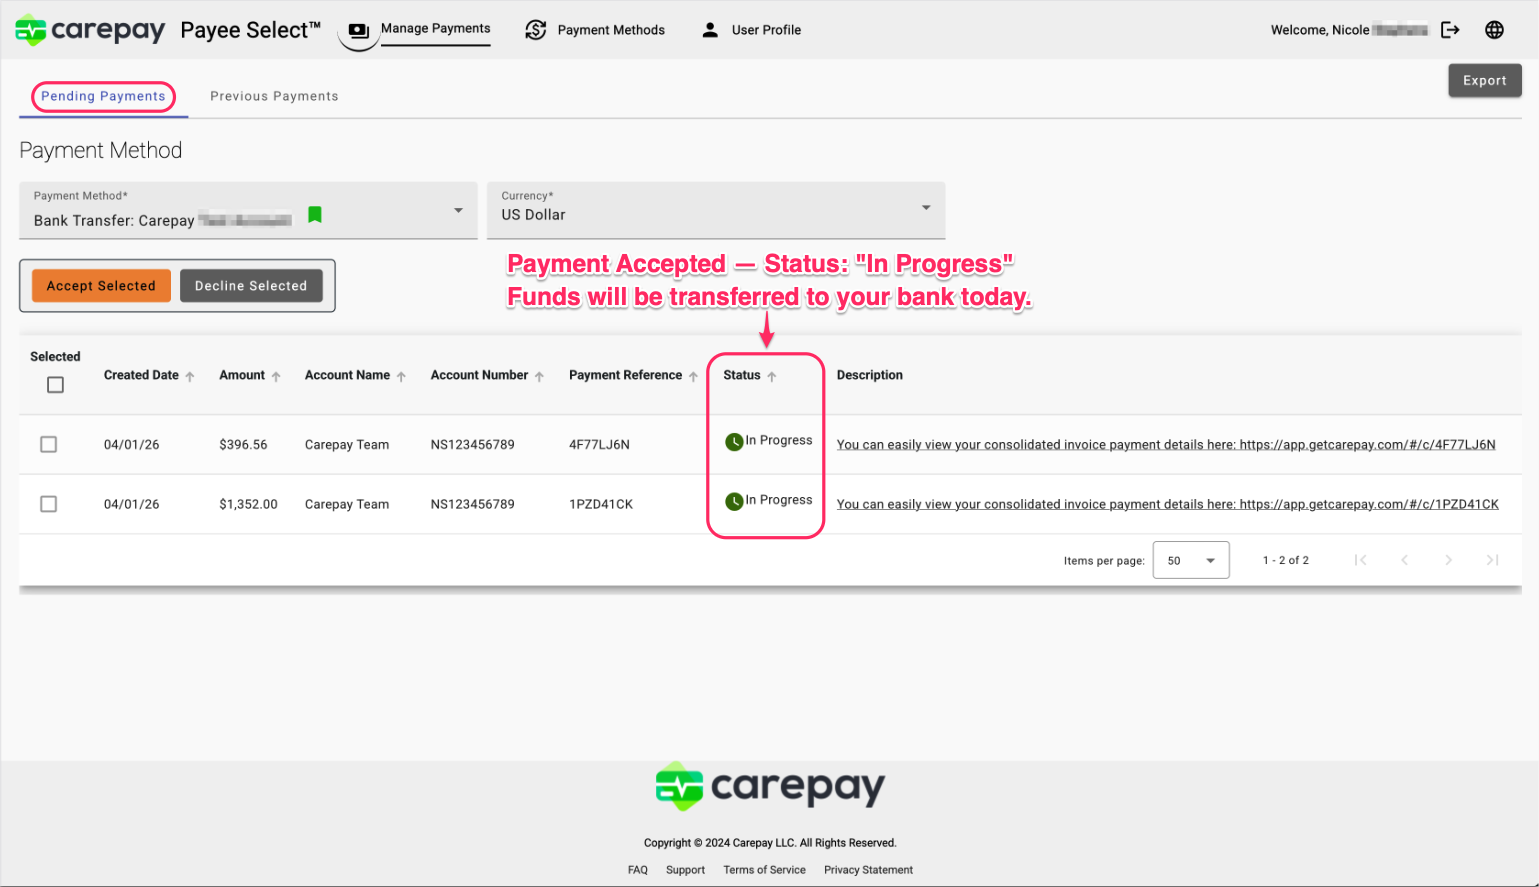
Once you enter your verification code, you officially approve the payment and initiate the transfer of funds to your Preferred Payment Method.
-
You will be brought back to your dashboard, where you can approve additional payments and view the status of your previously approved payments.
8. Receiving Funds in Your Bank Account
Once you accept the payment, the funds will be transferred to the bank account you designated during your ePayments enrollment. Depending on your bank's processing times, you should typically see the funds in your account within 1-3 business days of acceptance.
If you do not accept the payment within 3 business days of the notification, it will be automatically processed to your assigned bank account based on your Preferred Payment Method.
Additional Tips:
-
Keep Your Contact Information Updated: Ensure the email address and bank account details in your ePayments profile are always up to date to avoid delays in receiving payments.
-
Check Your Spam/Junk Folder: If you don’t see your payment notification email, check your spam or junk folder and mark the sender as safe to ensure future emails land in your inbox.
If you have any questions or need more help, please don't hesitate to get in touch with our support team at support@getcarepay.com or start a chat session with us by clicking the green button in the bottom right corner of your screen.